Insulated Siding Repair Tips
Insulated siding repair tips are crucial for maintaining your home’s curb appeal and protecting it from the elements. Understanding how to identify, assess, and repair damage to your insulated siding can save you money and extend the life of your home’s exterior. This guide provides a comprehensive approach, from identifying minor cracks to replacing damaged sections, ensuring your siding remains in optimal condition.
This guide covers a wide range of topics, from identifying common types of damage like cracks and dents to the more complex task of replacing entire sections of siding. We’ll walk you through the process step-by-step, offering practical advice and visual aids to help you confidently tackle repairs, whether minor or extensive. We’ll also discuss preventative maintenance to keep your siding looking its best for years to come.
Identifying Damage to Insulated Siding
Insulated siding, while durable, is susceptible to various types of damage over time. Proper identification of this damage is crucial for effective and efficient repairs. Misdiagnosis can lead to incomplete repairs or even exacerbate the existing problem. Understanding the common types of damage and their underlying causes is the first step towards successful restoration.
Common Types of Insulated Siding Damage
Several factors contribute to the deterioration of insulated siding. These factors range from environmental conditions to accidental impacts. Recognizing these different types of damage is vital for selecting the appropriate repair method.
| Type of Damage | Location | Appearance | Potential Cause |
|---|---|---|---|
| Cracks | Anywhere on the panel | Fine lines or larger fissures in the siding material; may be accompanied by separation of the outer facing from the insulating core. | Impact damage, settling of the house, thermal expansion and contraction, or aging of the material. |
| Dents | Typically localized areas | Depressed areas on the siding surface; may be accompanied by cracking or discoloration. | Impact from falling objects, sports equipment, or accidental collisions. |
| Delamination | Often along panel edges or seams | Separation of the outer facing layer from the underlying insulation; may appear as bubbling or lifting of the surface. | Moisture intrusion, improper installation, or age-related degradation of the adhesive. |
| Holes | Variable locations | Penetrations through the siding material; may be small or large, depending on the cause. | Impact from projectiles, animal damage, or accidental punctures. |
| Water Damage | Areas prone to moisture exposure | Staining, discoloration, swelling, or rotting of the siding material. | Leaking gutters, damaged flashing, or inadequate caulking around windows and doors. |
| Fading/Discoloration | Typically across large areas | Loss of original color, often unevenly distributed. | Prolonged exposure to sunlight and UV radiation. |
Importance of Identifying the Underlying Cause
Simply repairing the visible damage to insulated siding without addressing the underlying cause is often a temporary fix. For example, patching a crack caused by settling foundation issues will likely result in the crack reappearing unless the foundation problem is resolved. Similarly, repairing water damage without addressing the source of the leak will lead to further damage and necessitate more extensive repairs in the future. Therefore, a thorough investigation to determine the root cause is paramount for long-lasting repairs.
Assessing the Extent of Damage
Determining the extent of damage to your insulated siding is crucial for planning effective repairs. A thorough assessment will help you decide whether you can handle the repairs yourself or if professional assistance is necessary. This will also help you accurately estimate the costs and materials required.
Accurate assessment involves a systematic approach, moving from a visual inspection to a more detailed evaluation of the affected areas. This ensures you don’t overlook hidden damage and prevents potentially costly mistakes down the line. A simple flowchart can guide this process.
Flowchart for Assessing Insulated Siding Damage Severity
The following flowchart provides a step-by-step guide to assessing the severity of damage. It considers factors such as the number of panels affected, the type of damage, and the overall structural integrity of the siding.
Start → Visual Inspection: Identify damaged areas. Count the number of affected panels. → Damage Type: Is it minor (small cracks, loose panels) or major (significant cracks, holes, water damage)? → Extent of Damage: Does damage affect only a small section or a large portion of the siding? → Structural Integrity: Is the underlying structure compromised? → Minor Repair (Yes/No): If yes, proceed with DIY repair. If no, contact a professional. → End
Minor Repairs versus Professional Assistance
The distinction between minor repairs and those requiring professional intervention lies primarily in the complexity and extent of the damage, as well as your own DIY skills and comfort level. Minor repairs generally involve replacing a single damaged panel or addressing small cracks. More extensive damage, such as significant water intrusion, structural compromise, or widespread panel failure, necessitates professional help.
For instance, replacing a single cracked panel is typically manageable for a homeowner with basic DIY skills. However, repairing significant water damage that may involve addressing underlying structural issues or replacing multiple panels, often requires the expertise of a professional siding contractor.
Factors to Consider When Determining Repair Extent
Several factors influence the scope of necessary repairs. Careful consideration of these points will ensure a complete and effective repair strategy.
- Number of damaged panels: A few damaged panels suggest a minor repair, while widespread damage indicates a more extensive project.
- Type of damage: Minor cracks or loose panels are usually manageable DIY projects, whereas significant cracks, holes, or water damage often necessitate professional assistance.
- Extent of water damage: Water damage can lead to significant structural issues, requiring professional assessment and repair.
- Underlying structural damage: If the damage extends beyond the siding to the underlying structure (sheathing, framing), professional help is crucial.
- Your DIY skills and experience: Accurately assess your own abilities before attempting repairs. Underestimating the complexity can lead to further damage or unsatisfactory results.
- Cost considerations: Weigh the cost of materials and potential labor against the cost of hiring a professional. In some cases, professional repair might be more cost-effective in the long run.
Repairing Minor Damage (Cracks, Scratches)
Minor damage to insulated siding, such as cracks and scratches, can often be repaired successfully with minimal effort and cost. Addressing these imperfections promptly prevents further damage and maintains the aesthetic appeal of your home’s exterior. Proper preparation and the selection of appropriate patching materials are crucial for a seamless repair.
Repairing minor cracks and scratches in insulated siding typically involves cleaning the affected area, applying a suitable patching compound, and then carefully blending the repair to match the surrounding siding. Several patching materials are available, each suited to different types of damage and siding materials. The key is to choose a product that closely matches the color and texture of your existing siding.
Cleaning and Preparing the Damaged Area
Before beginning any repair, thoroughly clean the damaged area. This removes dirt, debris, and any loose paint or siding material that could interfere with the adhesion of the patching compound. Use a stiff brush or a pressure washer (on a low setting to avoid further damage) to remove loose particles. Allow the area to completely dry before proceeding. For deeper cracks, gently remove any loose or crumbling material using a putty knife or similar tool. Once clean and dry, lightly sand the edges of the crack or scratch to create a smooth transition for the patching material. This ensures a better bond and a more seamless finish.
Applying the Patching Compound
Once the damaged area is clean and prepared, apply the patching compound according to the manufacturer’s instructions. Typically, this involves applying a small amount of the compound to the crack or scratch, using a putty knife to smooth it out and create a level surface. Ensure the compound is applied evenly and fills the damaged area completely. Allow the patching compound to dry completely before proceeding to the next step. The drying time will vary depending on the product and environmental conditions. Check the manufacturer’s instructions for specific drying time recommendations.
Color Matching Patching Materials
Achieving a perfect color match is crucial for a visually appealing repair. Many home improvement stores offer a color-matching service for patching compounds. Alternatively, you can try to find a patching compound that closely matches the existing siding color. If a perfect match is not available, choose a slightly darker shade as it will be easier to blend and less noticeable than a lighter shade. After the patching compound has dried, lightly sand the repaired area to ensure a smooth surface. Then, apply a thin coat of exterior paint that matches the siding’s color. Allow the paint to dry completely before inspecting the repair. A second coat might be necessary for complete coverage and a durable finish. If the damage is extensive or if you are uncomfortable performing the repair yourself, it is always best to consult a professional siding contractor.
Replacing Damaged Sections of Insulated Siding
Replacing damaged sections of insulated siding requires careful attention to detail to ensure a seamless and weathertight repair. Improper installation can lead to further damage and compromise the home’s insulation and weather protection. This process involves removing the damaged section, accurately measuring for a replacement, and then securing the new panel in place.
The process of replacing damaged insulated siding panels typically involves several key steps, beginning with the removal of the damaged section and concluding with the installation of the replacement panel. Proper preparation and careful execution are essential for a successful repair.
Removing Damaged Siding Panels
Removing the damaged siding panel requires careful work to avoid further damage to surrounding areas. Begin by carefully prying the damaged panel away from the adjacent panels, starting at one edge. Use a putty knife or a similar tool to gently separate the panel from the underlying framework. Work slowly and methodically, taking care not to scratch or dent the surrounding siding. Once loosened, carefully remove the panel, taking note of any fasteners or clips used to secure it. This will aid in the installation of the replacement panel. If the panel is severely damaged or brittle, additional caution should be exercised to prevent breakage during removal.
Measuring and Cutting Replacement Panels
Accurate measurements are critical for a proper fit. Measure the length and width of the damaged section, including any overlaps or seams. Add a small amount of extra length and width to account for any potential discrepancies. Use a sharp utility knife or a specialized siding cutter to cut the replacement panel to the exact dimensions. Always cut on a flat, stable surface to ensure a clean, straight cut. A slight amount of excess material can be trimmed later if needed. Remember to always wear appropriate safety gear like gloves and eye protection when using sharp tools.
Installing Replacement Siding Panels
Once the replacement panel is cut to size, align it with the surrounding panels and carefully slide it into place. Secure the panel using the same fasteners or clips as the original panel. Ensure the panel is flush with the adjacent panels and that there are no gaps or overlaps. If using nails, ensure they are driven straight and flush to avoid damaging the panel. After installation, inspect the area for any gaps or irregularities and make any necessary adjustments. A properly installed replacement panel should blend seamlessly with the surrounding siding.
Necessary Tools and Materials
Accurate preparation is key to a successful repair. Gathering the necessary tools and materials beforehand will ensure a smooth and efficient process.
The following list outlines the essential tools and materials needed for this process:
- Measuring tape
- Utility knife or siding cutter
- Putty knife or pry bar
- Replacement insulated siding panel (matching existing siding)
- Fasteners (nails, screws, or clips – matching existing fasteners)
- Safety glasses
- Work gloves
- Caulk (for sealing any gaps)
Caulking and Sealing
Proper caulking and sealing are crucial for maintaining the integrity and longevity of your insulated siding. These areas are often vulnerable to water intrusion, which can lead to significant damage, including rot, mold growth, and even structural issues. A well-sealed exterior prevents water from penetrating behind the siding, protecting the underlying structure and insulation.
Caulking materials play a vital role in creating a watertight barrier around windows, doors, and other penetrations in your insulated siding. The choice of caulk depends on several factors, including the specific application, the type of siding, and the environmental conditions. Different caulks offer varying degrees of flexibility, durability, and adhesion.
Caulk Material Selection
Selecting the appropriate caulk is paramount for a successful and long-lasting seal. Acrylic latex caulk is a popular and versatile choice for many exterior applications. It offers good adhesion, flexibility, and paintability, making it suitable for a wide range of situations. Silicone caulk, known for its superior water resistance and durability, is ideal for areas exposed to constant moisture, such as around windows and doors. However, silicone caulk is not always paintable, so this should be considered. Polyurethane caulk provides excellent adhesion and expansion capabilities, making it a good option for areas that experience significant temperature fluctuations. However, it can be more challenging to work with than acrylic latex. The choice ultimately depends on the specific needs of the repair.
Best Practices for Caulk Application
Proper application techniques are essential to ensure a watertight seal. Before applying any caulk, the surface must be clean, dry, and free of any loose debris. This ensures proper adhesion. The caulk should be applied in a continuous, smooth bead, using a caulking gun. The bead should be slightly wider than the gap being filled. A backer rod, a foam rod inserted into the gap before caulking, can help control the amount of caulk used and prevent overfilling. Once applied, the caulk should be smoothed using a wet finger or a caulking tool, ensuring a neat and even finish. Allow the caulk to cure completely according to the manufacturer’s instructions before painting or exposing it to water. For example, a typical acrylic latex caulk might require 24 hours to cure before it’s fully waterproof. Regular inspection and re-application of caulk as needed will help maintain a long-lasting, effective seal.
Preventing Future Damage
Proactive maintenance is key to extending the lifespan of your insulated siding and maintaining its aesthetic appeal. Regular cleaning and addressing potential problem areas before they escalate into significant damage can save you considerable time, effort, and expense in the long run. By implementing a preventative maintenance plan, you can significantly reduce the likelihood of needing costly repairs.
Preventing future damage to your insulated siding involves a multi-faceted approach encompassing regular cleaning, addressing environmental factors, and performing routine inspections. Neglecting these preventative measures can lead to accelerated deterioration, compromising both the structural integrity and the visual appeal of your home’s exterior.
Regular Cleaning and Maintenance
Regular cleaning removes dirt, grime, and debris that can accumulate on the siding’s surface, potentially causing scratches or trapping moisture. A simple cleaning with a soft brush, mild detergent, and water, followed by a thorough rinsing, can significantly improve the siding’s appearance and protect it from damage. For more stubborn stains, consider using a pressure washer, but maintain a safe distance to avoid damaging the siding’s surface. Remember to always follow the manufacturer’s recommendations for cleaning your specific type of insulated siding.
Addressing Drainage and Overhanging Branches
Poor drainage around the foundation of your home can lead to water pooling against the siding, causing moisture damage and potentially leading to rot or mold growth. Ensure proper grading slopes away from the house to prevent water accumulation. Overhanging branches can also cause damage; their weight can crack or break the siding during storms, and their constant rubbing can create scratches and abrasions. Regular trimming of overhanging branches is essential for protecting your siding from this type of damage. Consider installing gutter guards to prevent clogs and improve drainage.
Annual Maintenance Checklist
A yearly inspection and maintenance routine is crucial for identifying and addressing minor issues before they become major problems. This proactive approach can significantly extend the life of your insulated siding.
- Spring Cleaning: Thoroughly clean the siding using a soft brush, mild detergent, and water. Inspect for any cracks, scratches, or loose sections.
- Summer Inspection: Check for signs of insect infestation, especially around seams and joints. Look for any warping or discoloration.
- Autumn Preparation: Clear gutters and downspouts to ensure proper drainage. Trim back any overhanging branches that could potentially damage the siding during winter storms.
- Winter Check: Inspect for ice buildup that may have caused damage. Check for any signs of moisture penetration, such as discoloration or mold growth.
Visual Aids
Visual aids are crucial for understanding insulated siding repair. Clear imagery helps identify damage types, assess repair needs, and ensure proper execution of repairs. This section provides detailed descriptions of correctly installed siding, properly and improperly executed repairs, and various damage types.
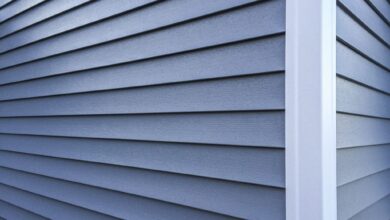
Properly installed and caulked insulated siding panels present a uniform, seamless appearance. Individual panels should fit snugly together, with minimal gaps visible between them. Caulk lines should be neat, thin, and consistent in color and application, completely filling any gaps between panels and around window and door frames. The surface should be smooth and free from noticeable imperfections, with a consistent color and texture across the entire wall. Edges should align perfectly, creating a straight, continuous line across the entire length of the siding. Any fasteners should be recessed and inconspicuous.
Correctly Installed and Caulked Insulated Siding Panels
Imagine a freshly installed wall. The panels are flush against each other, creating a smooth, unbroken surface. The caulking is a thin, even bead, neatly applied along all seams and around window frames, matching the siding color. There are no gaps or visible fasteners. The overall impression is one of professional installation and a high-quality finish. The colors are consistent across all panels, demonstrating uniformity in the installation.
Visual Differences Between Properly and Improperly Repaired Damage
A properly repaired section of insulated siding will blend seamlessly with the surrounding area. The repaired section will match the color and texture of the original siding, and there will be no noticeable gaps or inconsistencies. Improper repairs, on the other hand, are often readily apparent. Mismatched colors, uneven surfaces, and gaps around the repair are common indicators of poor workmanship. For example, a poorly repaired crack might show a noticeable discoloration or a gap where the caulking has failed to seal properly. A replaced section might stick out slightly or have a different texture than the original siding. These imperfections are visually jarring and detract from the overall appearance of the home.
Visual Characteristics of Different Types of Insulated Siding Damage
Different types of damage present distinct visual characteristics. Cracks might appear as thin lines, sometimes spider-webbing outwards from a central point. Scratches are usually superficial, appearing as shallow abrasions on the siding’s surface. More significant damage, such as dents or punctures, will be more obvious, possibly showing depressions or holes in the siding. Severe damage might involve broken or completely missing sections of siding, leaving large gaps in the wall’s covering. Water damage might manifest as discoloration, warping, or swelling of the siding panels. Finally, loose panels might be visible through gaps or misalignment. Each type requires a different repair approach.
Closing Summary
By following these insulated siding repair tips, homeowners can effectively address damage, preventing further deterioration and maintaining the aesthetic appeal and protective function of their siding. Remember, early detection and prompt action are key to minimizing repair costs and ensuring the longevity of your home’s exterior. Regular maintenance and preventative measures are crucial for preserving the investment in your home’s exterior.

